Hiya!

Thanks for visiting the lair of the Guitar Weasel!
If you enjoyed this blog please visit our Oil City Pickups site where you can see and buy our full range of products
.

Thursday, 6 December 2012

Making a Diesel Tap


Thought I'd show some of the stages in making one of our Diesel Tap  pickups ...

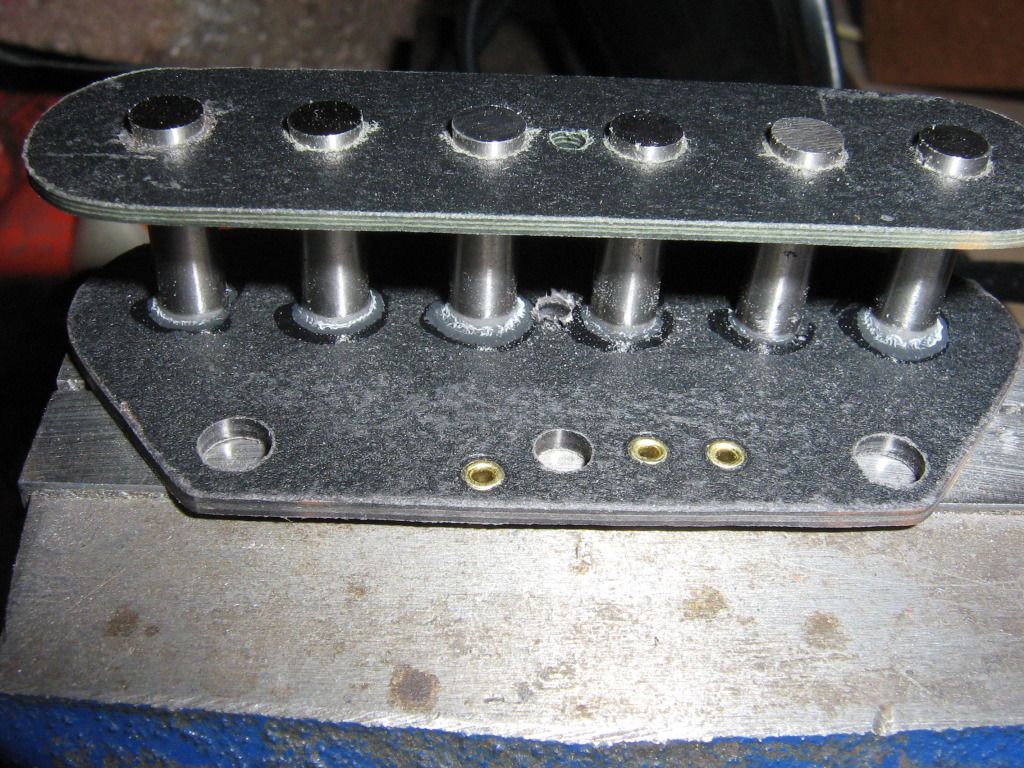
Here we have the assembled flatwork sitting on my vice ... having just had its eyelets set in ... yes three!
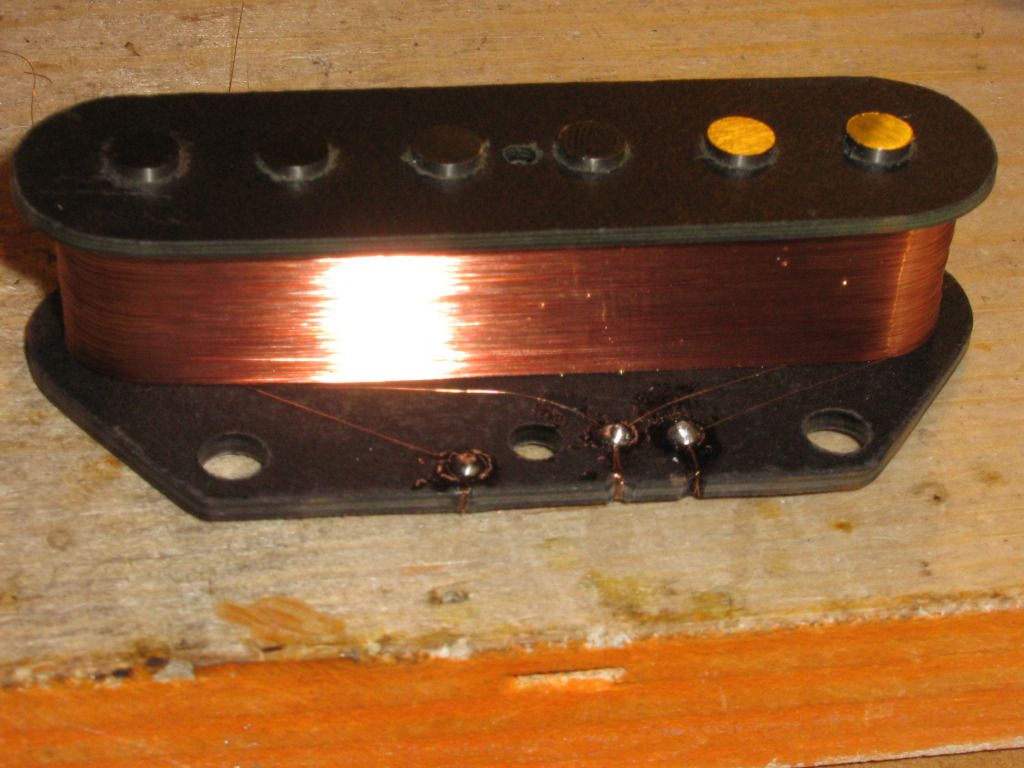
Coils wound ... here you can clearly see from left to right: coil start wire tap at 6.5k (centre) and coil finish wire ... the full 9k. A little cyanoacrilate adhesive is used to hold the wires to the bottom flatwork, and away from each other and the cable hole! After marrying up to one of our specially cut and gun-blued base plates ... the one for the 'Tap' is on the left ... with the wider 'cut out' ...
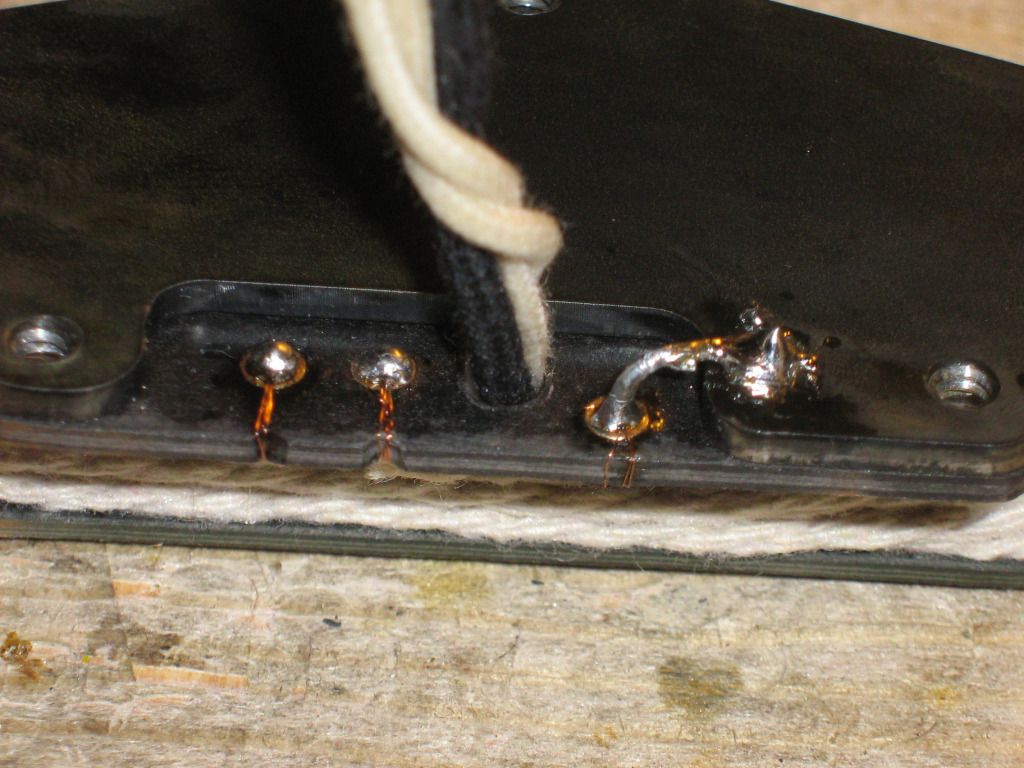
The hookup wires are added and the baseplate earth link. you can see I've string wrapped the coil to protect it too.
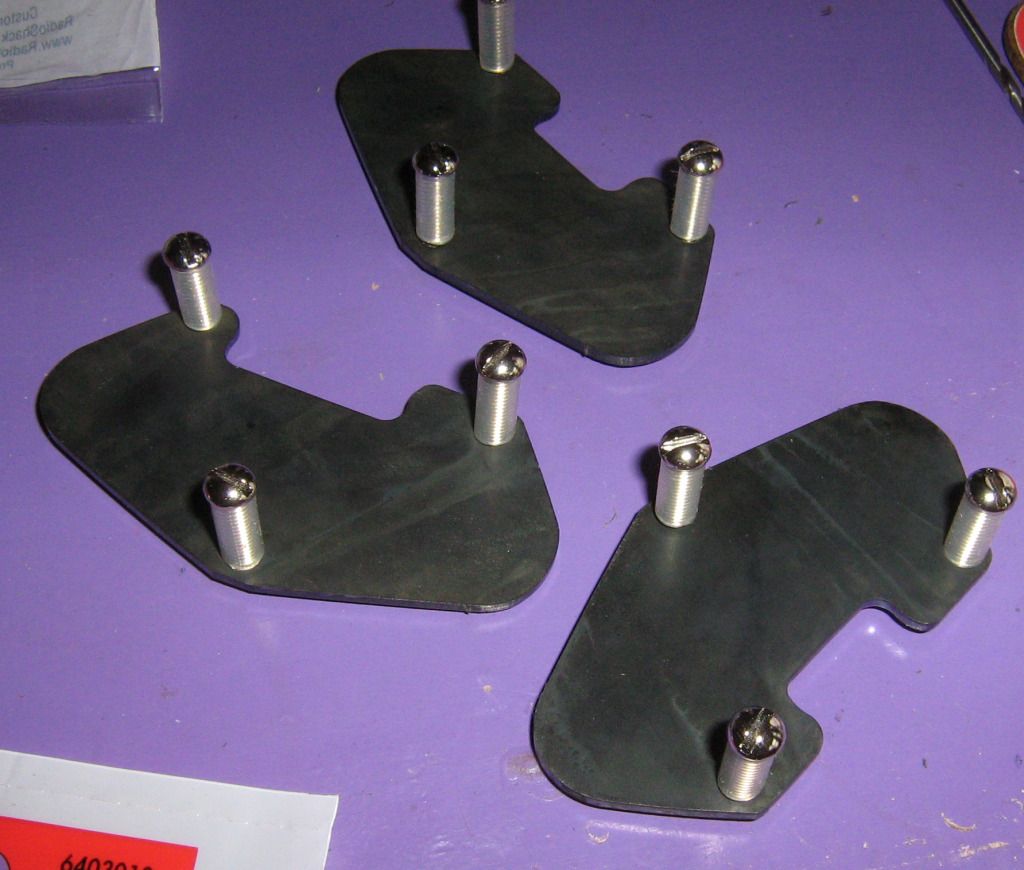
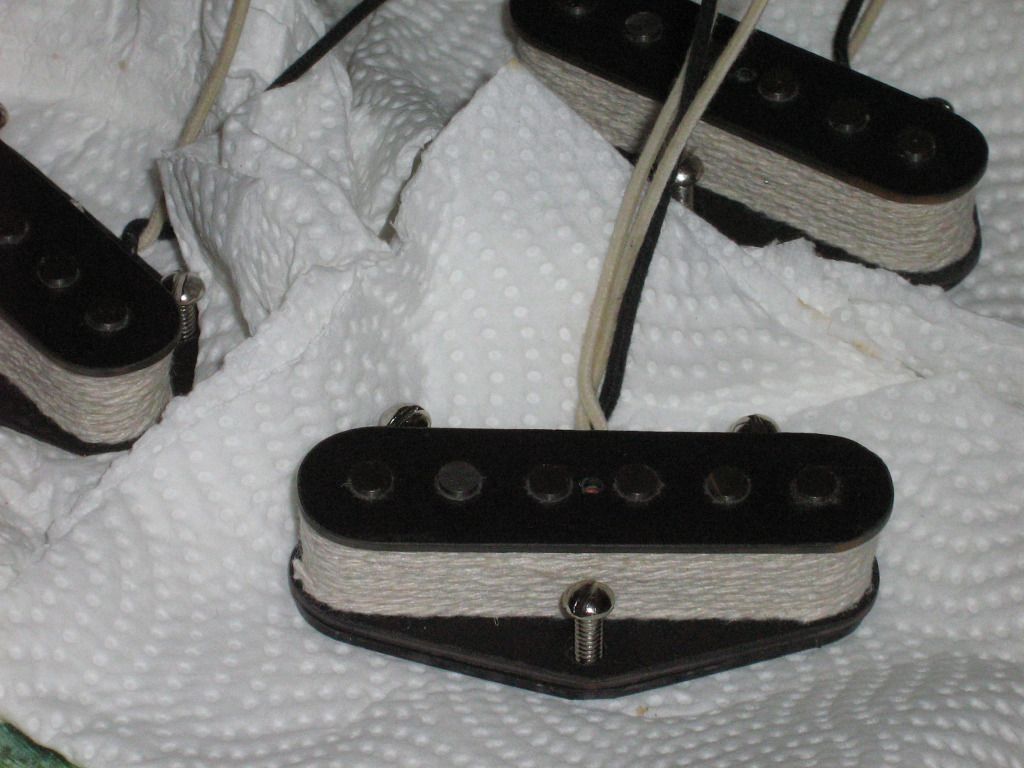
Here are the batch of three produced together (one Thames Delta, one HardMan and our customer's Diesel Tap) awaiting potting ... dummy short screws are used to keep the base plates aligned while in the hot beeswax/paraffin wax mix .
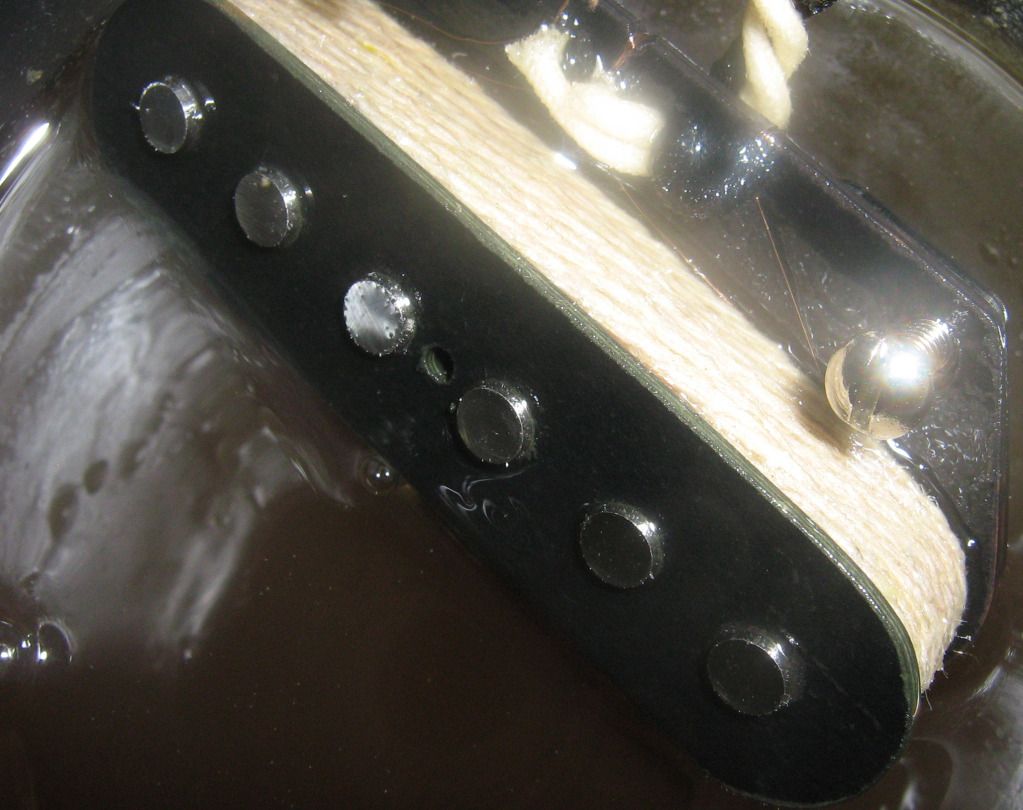
And the customer's 'Tap' emerges from the potting bath ...
It's cooled for an hour or so, before being checked electrically and having it's signed serial number applied ...
Then it'll join it's HardMan neck pickup and custom loom to be dispatched to the customer!

Thursday, 15 November 2012

The Oil City BrassKnuckle


To my mind far too many humbucking pickups today sound similar - everyone seems to be producing stuff with a tight, compressed, almost processed sounds. Everyone’s obsessed with vintage this and PAF that, 
forgetting that many guitarists need to find their own voice, not sound like the crowd. So enter the Oil City BrassKnuckle. It’s not a crowd follower … every element of its design harks back to much older concepts than current trend.  It’s a humbucker sure, but more than that, it’s two fully independent single coils, with separate alnico magnets for each string, mounted on an industry standard humbucker frame that will fit in any guitar built or adapted to take humbuckers.  The coils are custom made 50% taller than standard for enhanced top end response. A steel inner inductance plate, similar in function to a Telecaster’s baseplate, shapes the frequency response further.

 Left is a wound BrassKnuckle bobbin right a standard humbucker one.

What you end up with is a tone that is vintage, very broad in its response, and absolutely huge! Split down you have classic single coil cut and sparkle with masses of harmonic content and ‘air’ in the tone. With both coils in play power is there a plenty and the BrassKnuckle lends its self perfectly to all kinds of series/parallel in or out of phase switching combinations.

Coming soon  … the BrassKnuckle neck position humbucker.


Friday, 19 October 2012

Replacing a Fender Wide Range 'reissue' humbucker


Well, here is the put up or shut up moment. After six months or more brewing away in my head as an idea, another couple months sourcing parts and researching construction techniques and spec … here is the first Oil City Buccaneer Wide Range replacement going into my business partner Tim’s Japanese Tele Deluxe reissue.
The original Fender ‘reissue’ unit:  problem? It sounded nothing like a proper 1971 Wide Range pickup as designed by Seth Lover.  Not an awful pickup, but muddy and a bit wimpish.  The original Wide Range had a reputation for string definition, and a big, fat, rounded tone: plenty of highs and lows. Sadly Fender’s reissue only looks like the original on the outside … the guts are not much different than a standard humbucker.

So out with the Fender reissue: an issue sprung up at once. The reissues use bigger diameter metric mounting screws. Luckily I had a few of the proper diameter and thread in my ‘junk’ box. Oops three nickel plated and one gold plated. I used the old repairman’s dodge and ‘cleaned’ the gold screw head with metal polish … gold is plated on top of nickel … so a couple of rubs had stripped off the gold plating to reveal the nickel underneath (one reason I hate gold hardware … it never stays gold long!)
Soldering in the Buccaneer was the work of a couple of minutes. It’s four conductor – unlike either the original or the Fender reissues, so the green and white wires are soldered together and tied back.
 I could have fitted a coil shunt on a push pull switch … but I was eager to hear the results, and it’s … er … not my guitar, so I'd have to consult Tim first! I was a bit shocked how cheap and weedy the original wiring was, but that will be taken care of later (for the reason why read on).

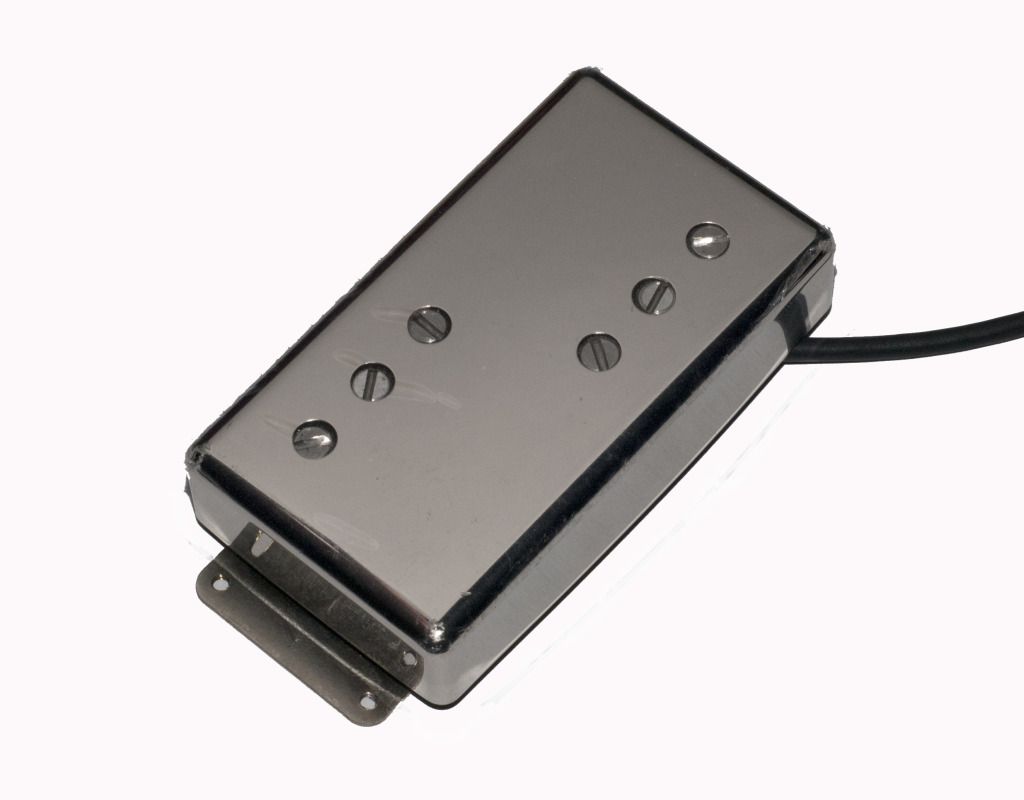
The Buccaneer uses the same size jumbo coils as the real 70s item, but not the horribly expensive  and almost impossibl to get CuNiFe magnets like the original. Instead I have opted for Alnico rod magnets with dummy screw heads ... I mean who actually needs to adjust a humbucker's magnets ... honestly? I have also included the 'reflector plate' left out in the fender so called reproductions.
Buccaneer in place with a sticky clear film hiding it's virgin shininess mmmmmmmm shiny! Just like the 70s original there is only one string spacing between the bridge and neck versions, so the poles go a little off ... but hey, that looks 'original' and really makes no difference to the output.


Well, back together, and sounding like a Wide Range equipped guitar ought to. Gone is the smeary, slightly muddy grumble of the reissue pickup. In its place round, fat, bell like tones that break up well into really musical overdrive.
There is one issue that has to be addressed though; the power and fatness of the Buccaneer WR has shown up the asthmatic and weedy output of the bridge single coil. Worse than most Fender pickups I have tried, it is truly scrawny. Mixed together both pickups sound good, but flicking to the bridge is an exercise in disappointment. I’m judging the bridge resistance  output to be about 6/6.5k and it’s not much surprise that it is marmalised by the mahoosive 11k neck pickup. So … back into Oily Towers winding dungeon I sidle … methinks an Oil City 'Diesel Tap' with dual 7.5k and 11k outputs should do the trick in the bridge position. Two push pull pots, one to shunt one of the Buccaneer coils, and one to switch outputs on the bridge PU. That’ll produce a versatile and punchy instrument from a bit of an ‘also ran’.

As a footnote Buccaneers are available to buy to special order at the moment. There is a month’s wait, but they are the least expensive WR replacement on the market …e mail me at ash@oilcitypickups.co.uk for a price and expected delivery date.
Weasel Power!

Sunday, 14 October 2012

The Oil City Buccaneer ...

Those of you who have followed this blog for a while will know I have been working for some time on getting a Fender Wide Range pickup replacement to market ... well here's the first view of the (nearly) finished pickup: The Oil City Buccaneer ... named in homage to the late Mick Green of the Pirates fame. He was a notable user of a WR equipped Tele, getting some great tones from it.
This little beastie features non adjustable alnico 5 pole magnets (with dummy screw slots) and proper over sized bobbins, wound to vintage spec with 42awg wire. It comes as standard with four conductor wiring ... and best of all, it should be the least expensive proper sized WR replacement in the market.
Supplies of these will be very limited at first , until I am fully geared up for production, and those showing an early interest will get first dibs! drop me an e mail on ash@oilcitypickups.co.uk for more details.

Friday, 7 September 2012

Thanks again guys!


Customers have been putting videos featuring our pickups on U Tube: thanks so much ... it all helps to raise our products profile ... plus I actually get quite emotional hearing others enjoy my designs.


Monday, 3 September 2012

Improving 2 Vintage V100s 'Iced T's final part


On with part four.
Here we see the new Blitz Spirit neck humbucker nestling in the rout as I tried the ‘legs’ out for depth.  I usually find a couple of snags in any job … and I found one here. The long legs on the nickel silver base plates fitted in fine, but the clumsy metric height adjustment screws fitted to most ‘import’ guitars, including the Vintage  won’t fit US/Gibson spec baseplates.  The only US spec adjustment screws I had in stock were  1” rather than the vintage Gibbo 1.25”. This means that I won’t be able lower the pickup enough to clear the strings properly when playing up at the last two frets. Never mind … I ordered a bunch of the correct screws and resigned myself to living with a guitar with 20 usable frets till they arrive!
 Back to the rear of the guitar

I use small loops of tape to hold back the wiring while I solder other areas. As I have said the compartment is very tight and it’s easy to melt the insulation on other wires if you don’t clip everything back and work tidy. The Blitz’s spirit humbucker four conductor output wires are the black ones.
And here’s the completed job.


I’ve insulated the output jack cable with 9mm rayon loom tape for neatness … and the job’s a good-en!
Time to plug in and test out: the original Wilkinsons sounded thick and quite powerful, but with a really ‘clouded’ top end on the neck pickup sounding ‘soupy’ and poorly defined. The original bridge pickup sounded a touch thin, with a gritty top end, and overall a bit screechy. The Blitz Spirits are a cooler wind 7k and 7.9k as opposed to 8.5 and 14k for the Wilkinsons and have the softer more rounded sounding alnico 2 magnets. Plugged into the clean channel of my Laney LC30 mk2 the difference was pretty spectacular: even with a cooler wind and magnets the ‘Spirits’ are subjectively much louder than the Wilkinsons. Plenty of woody tones are available, and nice sparkling highs available from both pickups. Hummm now for the acid test … cranked tones … what everyone judges a Les Paul by.  In a word ‘smooth’!  Keeping sweet, singing tones that break up as you dig in is easy … and as the gain gets towards the hard rock/ metal end, the pickups natural compression flatters your playing nicely.
The combination of ‘Iced T’s’ weight and vintage style neck and the Blitz Spirit’s soft, smooth and expressive character makes for a really nice ‘blues/blues rock LP clone. Quite versatile enough for hard/heavy rock, but perhaps lacking that scream for the metal end of things. Though I have to say there is more than a hint of a famous leather top hat wearer when the pressure is applied!
I’m very happy … though waiting for the screws to lower the neck pickup a tad.  I will post some sound files as soon as I can.
The Oil City ‘Blitz Spirit’ set will be available from next month for around £90 in black or zebra.


Saturday, 1 September 2012

Improving the beasts: Vintage V100s Part 3


Right, on with part three of the improving the Vintage V100s!
Firstly before starting any work on a nice shiny guitar we need some protection for the finish. A slipped screwdriver or some stray molten solder can wreak havoc, so better safe than sorry. There are lots of different ways of doing this … but mine uses a couple of layers of low-tack 2” masking tape. It’s easy and fast to apply, protects against most things, and peels without leaving residue. My workbench has a folded pad of material (some old red drape – a souvenir from the Royal Albert Hall) to protect the instrument, and the neck is supported in a foam cradle.
Right off with the lid to see the rubbish within Iced T’s innerds


Not even as pretty as Tobacco’s!  Puny wiring and pigeon-poo soldering … yuck. The switch compartment was similarly nasty!
Someone seems to have had a hole drilling party here oddly. Only three are used to mount the cover!

First Job: the pots: 500k, 2 logarithmic taper for the volume, and two linear taper for the tone. Others may argue and say Log for everything … I quite like log for tone … and it’s my guitar okay?
I punch some holes in cardboard in the pattern of the mounting holes in the guitar top and assemble the bulk of the harness on the bench … NOT IN THE GUITAR! Why? Because there’s bugger all room in a Les Paul wiring compartment , and the depth of the rout makes it tough to see what you’re doing at the bottom. Much better out where the dog can see the rabbit!

Note: I’ve used some cloth insulation stripped off my stock of ‘hookup’  wire on the capacitor legs. Belt and braces really … a lot of people wouldn’t bother, but if one of those legs grounds out to that ‘earth bus’ that links the pots, there’ll be trouble and things won’t work properly!
There’s a great deal of bollocks talked about paper in oil capacitors and how smooth and vintage they sound … mostly it’s talked by those who want to sell you ‘vintage’ capacitors! Simply get a good cap (in this case .22uf Sprague Orange Drops)  and save your money. There is no detectable difference between vintage and modern high quality caps … end of story.
Right out come the Wilkinson humbuckers 


note the protection for the body
I’m going to be re wiring with proper, fifties style single conductor screened cable (Allparts UK) and it will be a tight squeeze getting it through those wiring tunnels! 
Three long lengths go from the switch compartment to the control compartment … measure thease carefully using the old wiring as a pattern!


I’m keeping the original switch for the time being … it works fine, and as I said before … this is on a budget.
There is an old fifties knack to parting the braid neatly on this type of cable … my dad was an old fifties engineer and taught me:
First kink your wire

Then use your nails or a non-metallic instrument to gently part the braids on the apex of the ‘kink’


Then using a small pointed tool - I use an old multi meter probe - pull the ‘tail' of wire out through your newly made hole 


Like so … lovely and neat … and period correct!

That’s about all I have room for here …

See you in part 4 where I put it all together!