
As many who visit here will know, I was a regular contributor to the Music Radar forum ... which suddenly suddenly went 'down'. Well the good news is the cast away members have forged themselves a permanent new home here http://thefretboard.co.uk/
You will find me there as a regular contributor ...
Ash (AKA the Guitar Weasel)
Wednesday, 24 July 2013

Friday, 10 May 2013
New pickup prototype

An often ignored design ... at least outside of rockabilly ... is the DeArmond Dynasonic ... or 2000. Top end clarity and bite, bottom end slap and grind, yet not as 'middle heavy' as a P90.
Here is my first prototype bobbin and plastic top insert (white here ... but production ones may well have a choice of black, parchment, mint or 'tortoise shell'.)

I will be dispensing with the mechanism, and pre-setting any stagger to the poles (fine with modern strings), though keeping the distinctive adjustment screws as simply dummies. I will also be making these with the standard humbucker and soap-bar P90 form factors to enable the widest spread of users to be able to fit them to their guitars.
Bit more jig and tool making to do yet ... but all part of the game
TGW
Thursday, 9 May 2013
New pickups for Ibanez Artcore No1 ... yes I have 2 now!
Two more pickup demonstrator guitars have joined the Oil
City fold … both Ibanez Artcores, and both … I have to say … absolutely
exceptional instruments. The first to arrive was a sparkle black thin body
‘Western Graphic AFS75TD … destined to host a pair of my Cow-T-Ron Gretsch
style humbuckers. The second a gorgeous antique ivory finished deep body AF75
... I’ll come to my choice of pickup prototypes for that beauty later!
Here’s
the AFS75TD before I started work!
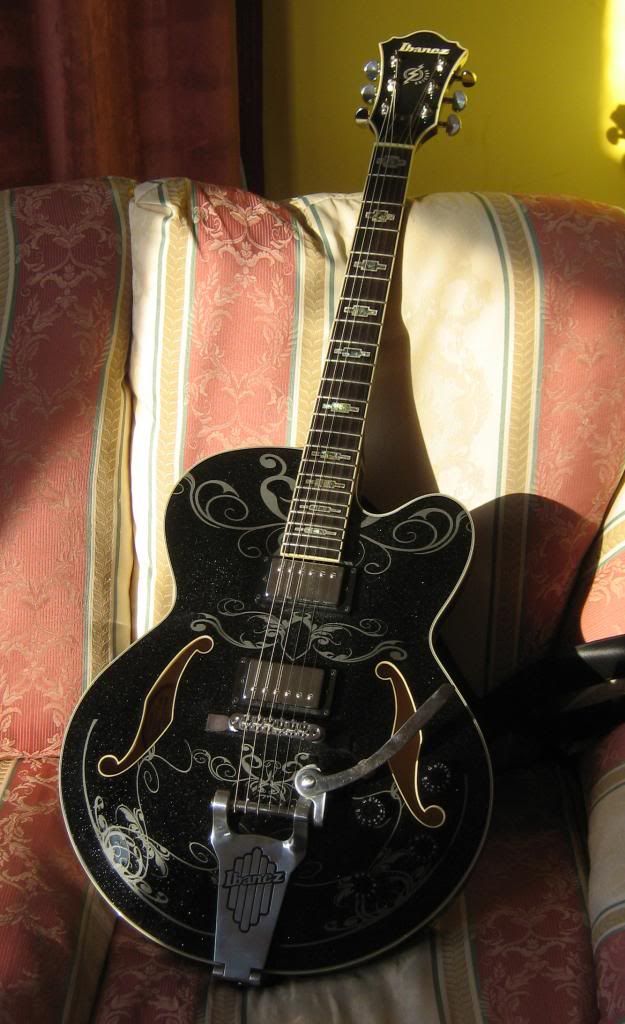
The most horrible thing about this beastie were the ACH1 and
ACH2 Ibanez pickups fitted. The whole top end was is muffled in woolly yuckiness …
and the bridge pickup was harsh and
brittle yet had no real punch.I will try and post some sound files to illustrate (yuck).
Right, out with the old and in with the new … a nice shiny
pair of Cow-T-Ron Specials with the nice
curved tops!
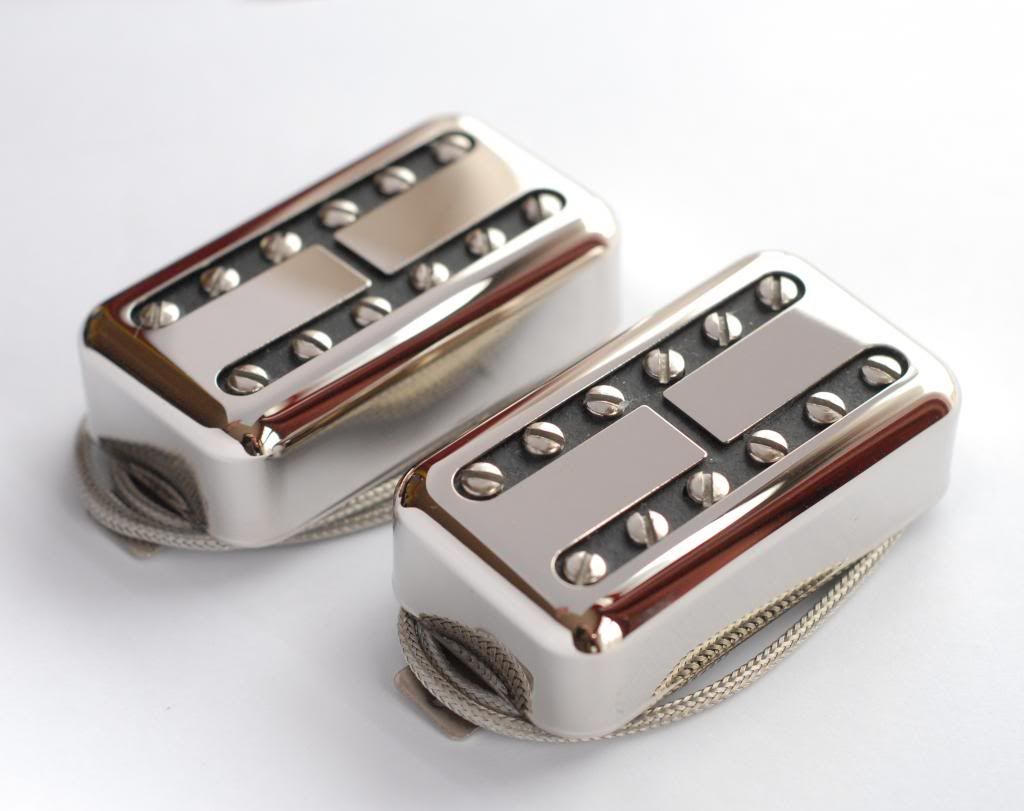
Mmmmmmmmm sexy (though I say so myself).
For those who don’t know, the Cow-T-Ron is my take on Ray
Butts classic FilterTron design … but in a humbucker size. The output on these
is low … around 4.5k neck and 4.8k bridge … but the sound is powerful for such
a slender coiled beast, and loaded with that hollow rockabilly bark.
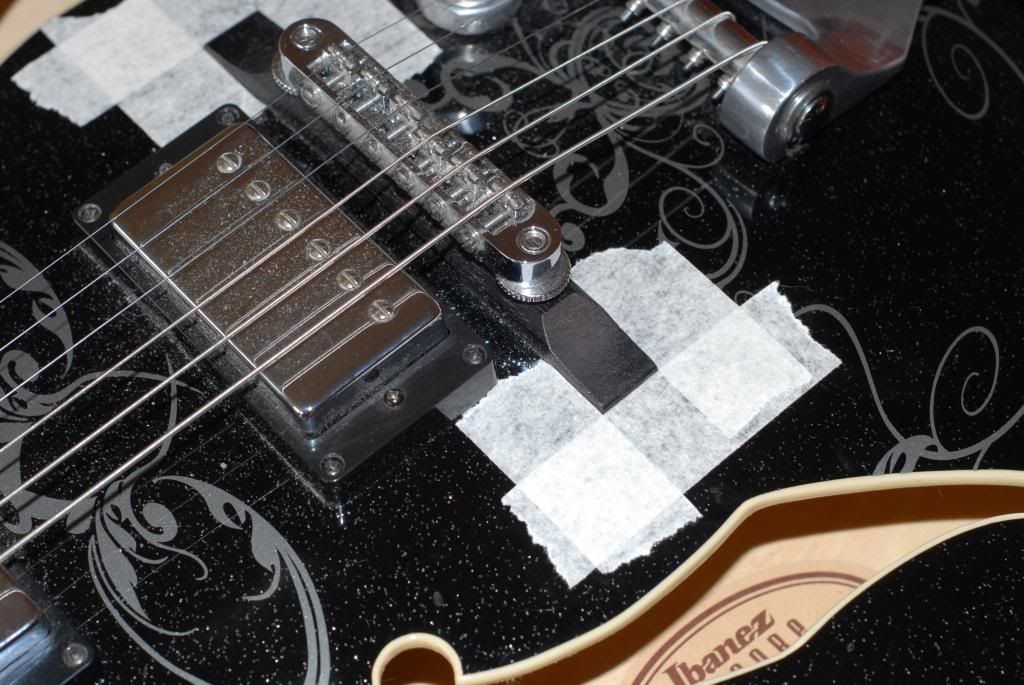
So to the first job before those pickups come out: that
there fully floating bridge will simply drop out when I slacken the strings,
losing the intonation settings … so some masking tape will show me exactly
where to reposition the bridge after the work’s done. I shall probably use some
double sided tape unser the bridge ‘feet’ to help hold it in position. I’m a
powerful strummer, and have been causing the whole bridge to move fractionally
sideways after heavy playing sessions. This should keep things lined up!
The pots will be replaced with the pickups, but I’ve decided
to reuse the existing wiring as it seems pretty good on the whole. I decided on
Alpha full size pots rather than CTS as this will save reaming the pot holes in
the guitar’s front to take the larger CTS shafts. It’s not simply laziness …
okay well it is mostly, but Alphas are pretty robust and until I hear the
instrument with the new pickups I don’t yet know if it will be a keeper!
After the strings come off the first job is off with the
Bigsby vibrato tailpiece so I can trap the tailpiece earth wire so that I can
get enough slack to pull out the wiring harness without losing it inside.
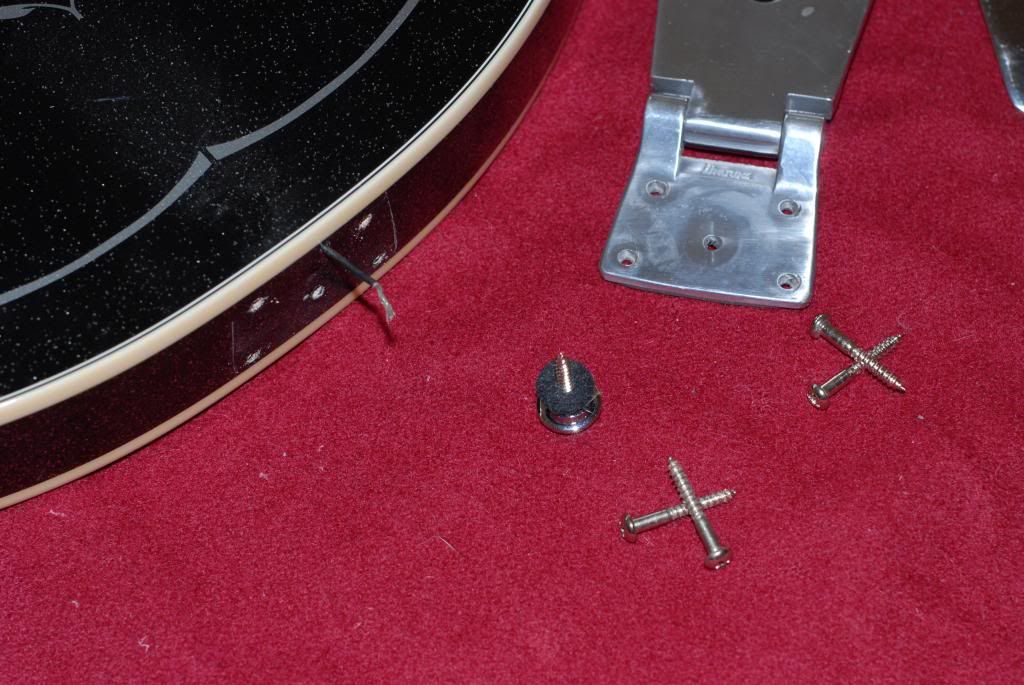
So I soldered an old guitar string to it and gently pushed
it inside … the string will allow me to easily pull it back after the
pickup/pot swap.

For semis where the selector switch is on the top bout I
would next have attached string to the switch shaft with tape then unscrewed
the nut and pushed the switch inside before attacking the pots. However the
Artcore has its selector switch in rather an odd place: right next to the volume pots. This is
convenient for the pickup swap, as the switch is reachable through the f hole …
but is actually a bit of a pain when playing as it falls right under the bigsby
arm! I the future I may install a selector switch on the top horn if I can get
round to it, perhaps putting a master
volume or ‘varitone’ switch in the redundant hole.
Out with the nasty mini pots. Notice the masking tape to
protect the finish from any nasty accidents!

The old pickups are separated from the harness and the new
units fitted.
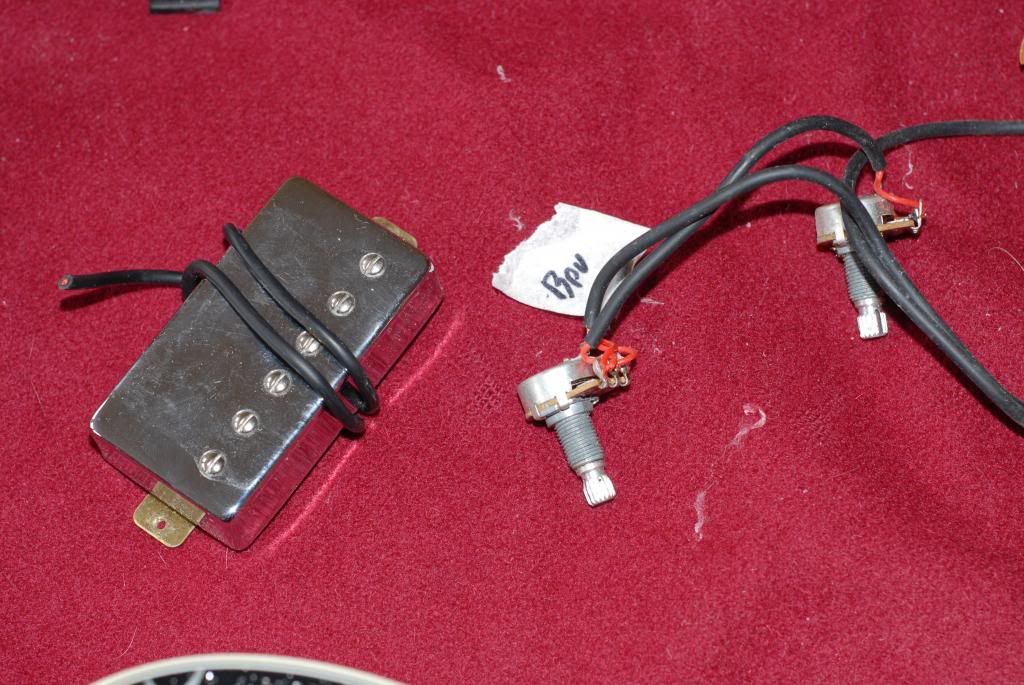
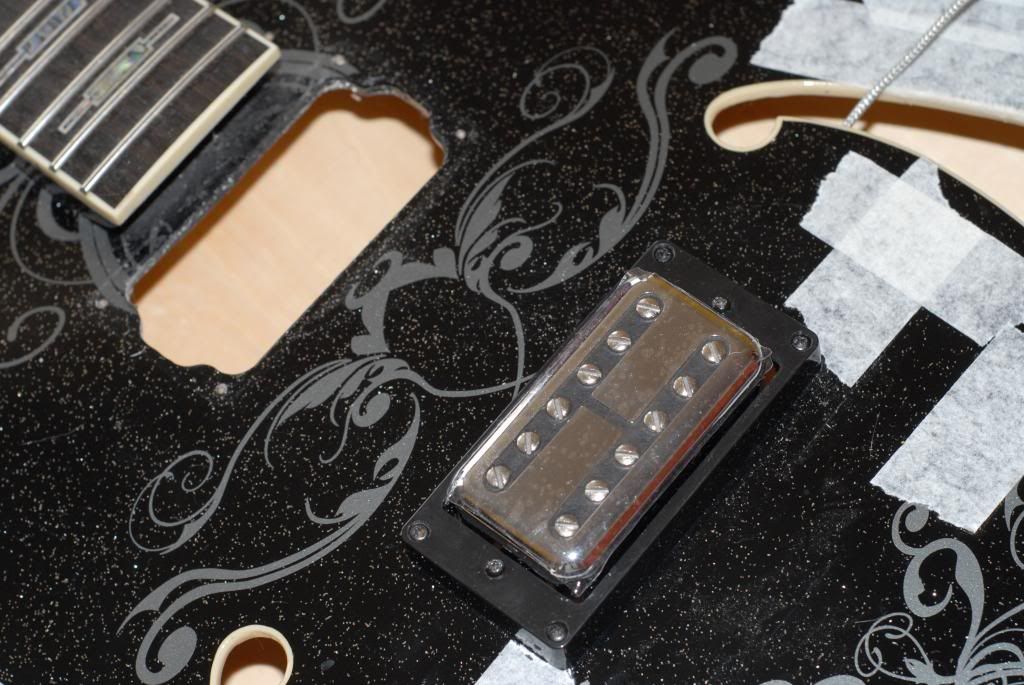
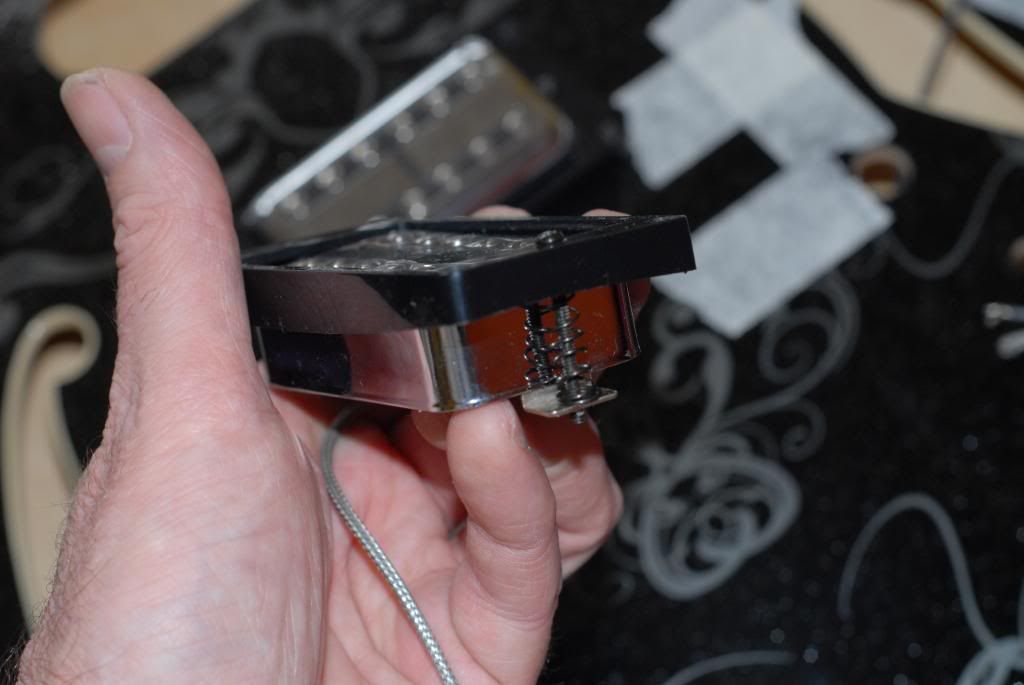
The Ibanez units use horribly short springs so I raided the
parts box for some longer ones to allow a full range of adjustment to the
Cow-T-Rons.
You will probably notice I haven’t bothered feeding string
through the ‘pot’ holes as I removed the
old controls … if I were replacing all
the wiring I probably would have done. However the layout of the controls is
nice and close to the f hole, so I will pass the string through once the re
wire is done (saves getting tangled in multiple strings as I’m soldering
I’ve laid out the new components and soldered in the new
caps to the replacement tone pots
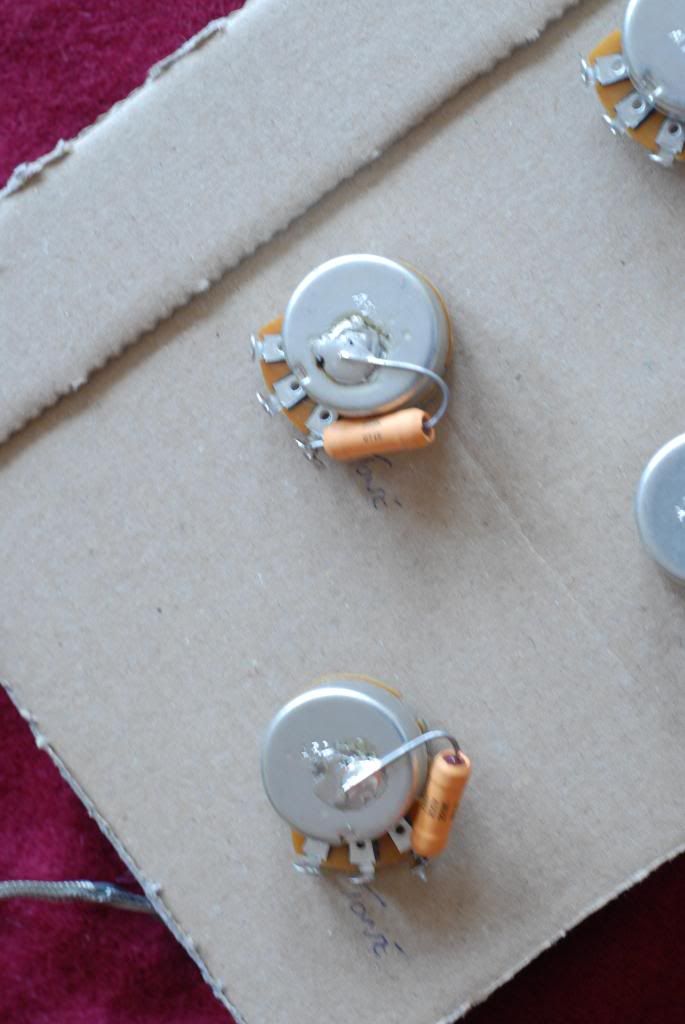
Components are now carefully soldered in and cotton cord brought
through the control holes and out of the f hole. I tend to use gaffer tape and
a quick turn around the control shaft to secure the cords to the pot s … but it
does require a careful hand not to lose a pot inside and thus have to start
again from scratch. And it’s always the last pot you lose!
Firstly the jack socket is eased into place. I use stiffer electrical wire instead of string to guide that to it's hole. A kink of wire is made around one of the jack contacts so that it grips the component under tension ... but once the jack is in place with the nut slid over the wire and tightened a couple of turns ... then a little more gentle tension will unkink the wire and it will just slip out.

Next the pots go into position
Slowly slowly is the order of the day ... and a dentist's inspection mirror is handy when things get snagged (as they often do).
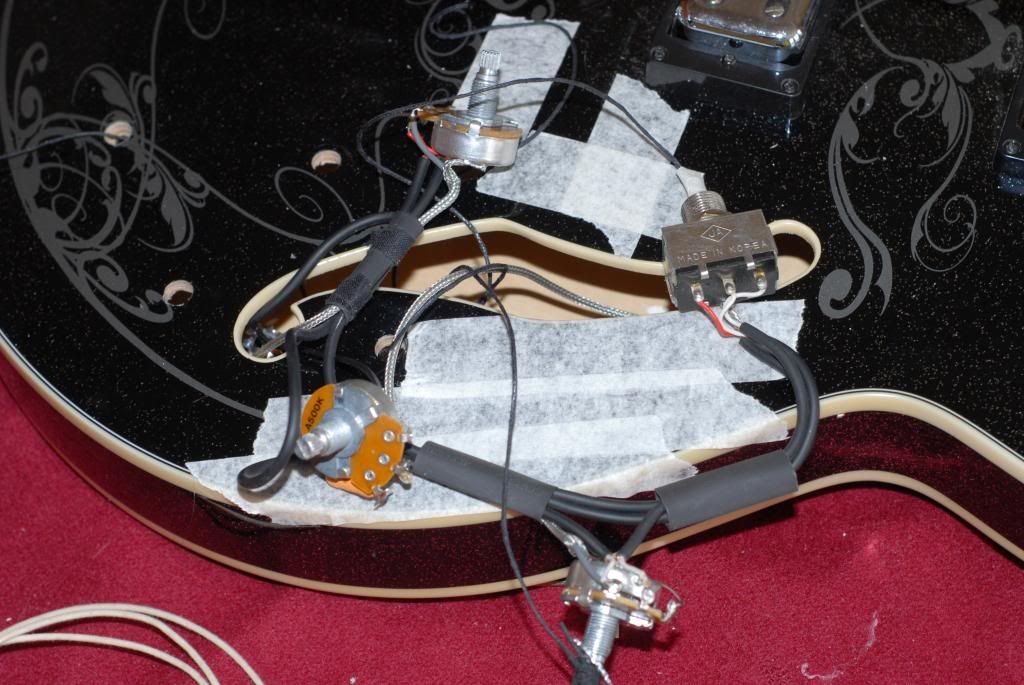
All back together ….
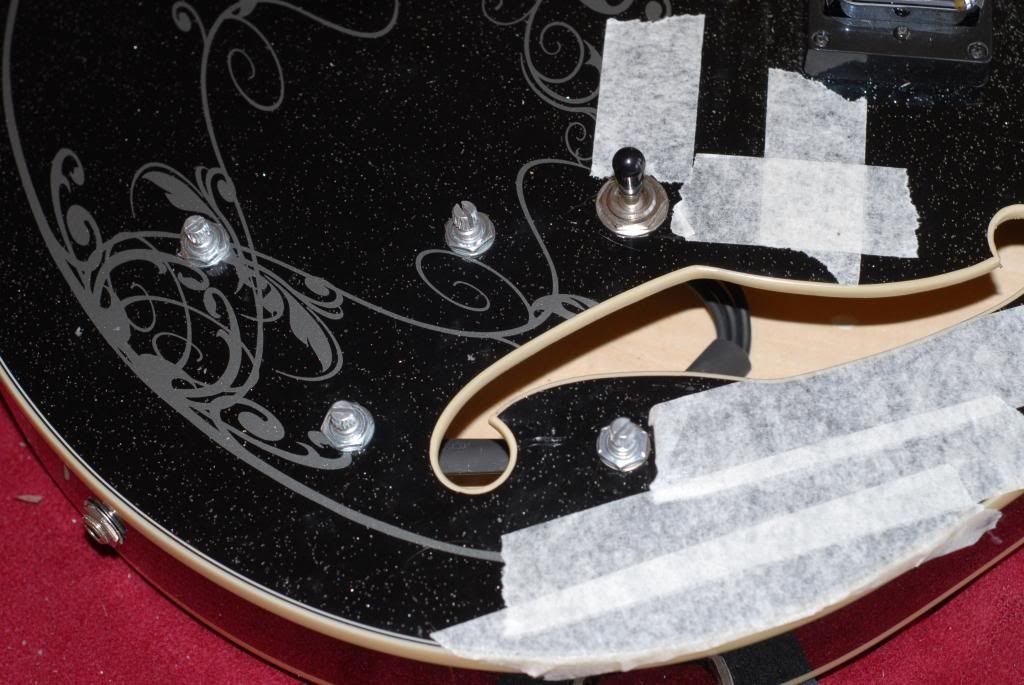
... then some heavy chrome Gretsch style
knobs to complete the ‘look’.
I will post some sound sample shortly, but the difference is
startling: gone is the muddy, ‘cardboardy’, unrefined sound. In its place
cutting treble, thwacking bass, and nicely
scooped mids.
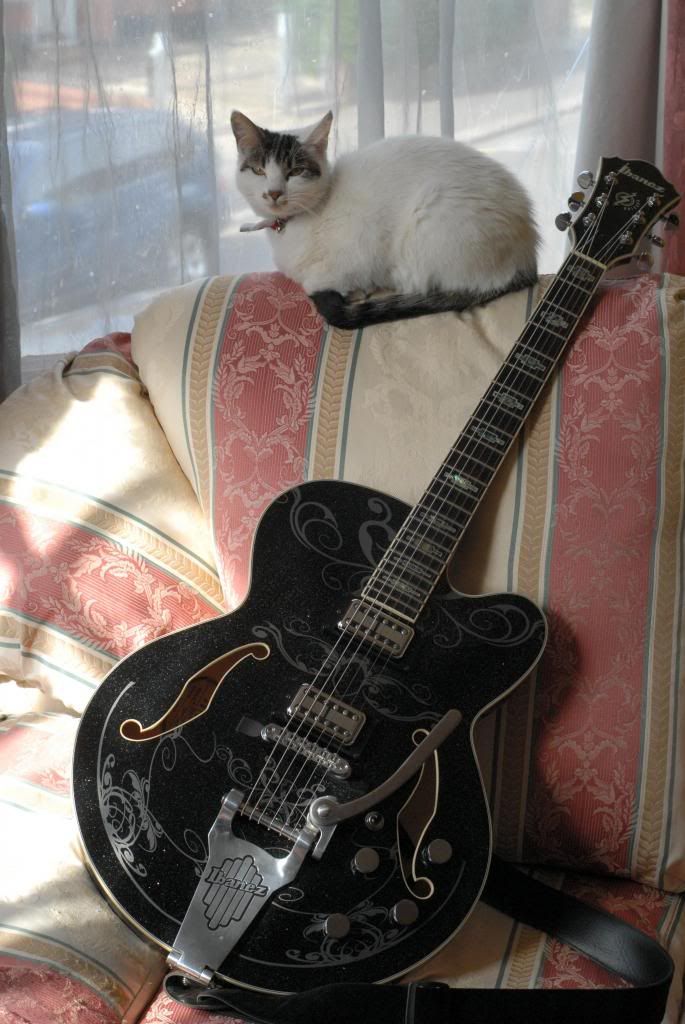
It’s now a serious looker too ... see how it attracts cool cats?
Here's a taster of its white stable mate!
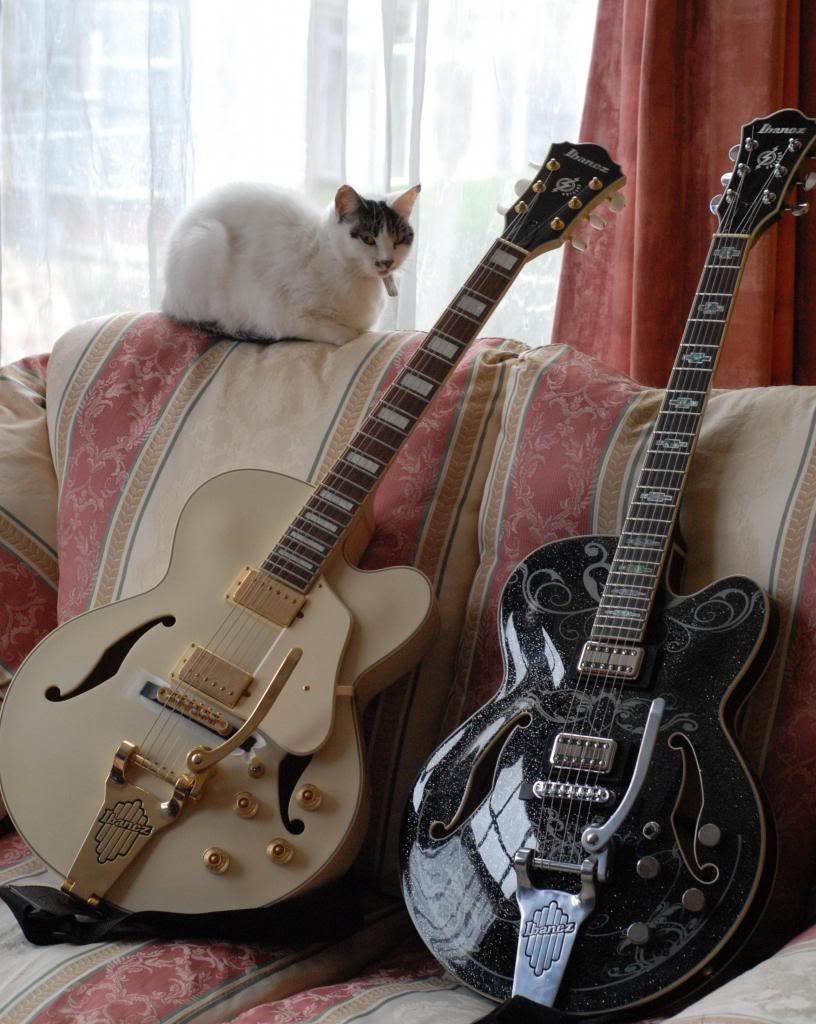
Saturday, 20 April 2013
Gauss 2 ... return of the gauss!

In the next part I will talk you through assembly and interpreting the results ... happy days!
Tuesday, 2 April 2013
Is there a gauss in the house? Pt 1
 |
| My old Mk1 gaussmeter! |
Why, you might ask, might an ordinary guitarist need a gauss-meter (or
magnetometer)? Er … well you can probably
see why it might be useful to me as a
pickup maker, dealing with magnets all day … but why might you want to make one? Well aside from curiosity
and stuff like that … if you mess about changing guitar pickups etc and more
importantly, occasionally swapping humbucker or P90 magnets … a tool that not
only lets you tell the polarity of a pickup, but also its flux strength is a
pretty cool thing to have. You can even 'age' magnets yourself once you can measure before and after strength, and ...the clincher
... is when you discover that a DIY meter need only four components, and requires
only that you can solder reasonably well to make it! You will need a digital multimeter to read the info your gauss meter is sending out, but many of us have one of those anyway, and a cheapo e bay one for six or seven quid is fine.
Reality check? Okay, so a cheap compass will work for checking pickup polarity ... and a Schatten polarity tester - from StewMac in the US - will do an even clearer job. But with postage, the Schatten (which is only a little magnet in a tube with one pole marked nort and the other south) will cost more than building a gaussmeter ... and one of these is WAY cooler and should cost less than a tenner ... fifteen to twenty quid if you have to buy a cheap multi meter!
Firstly the major component is a ‘hall effect device’. This
little gismo is used in many applications, and has the neat property that when
you feed it a nice stable voltage of say, five volts … a nice stable 2.5 volts
comes out the other end. ‘BORING’ you
may cry … well yes, until you put the hall sensor in a magnetic field … then if
the pole is ‘south’ the voltage goes up proportionally with the strength of the
magnet … and if north, it goes down … again in proportion to the strength of
the field.
In theory we only need to feed that 5 volts in and measure
the DC voltage ‘out’ with a digital multi meter
to have a crude, functioning gauss meter. In practise it’s only slightly
more complex than that: if you intend to power the hall sensor from a 9v
battery then you’ll need a ‘voltage regulator’ to deliver that 5 volts. Many
people leave it at those two components … but I was taught that it’s a good
plan to ‘filter’ the DC from the battery to the power supply and also filter
the power supplies’ output to the hall sensor … just to provide nice squeaky
clean DC where it’s needed. That simply
means a capacitor before the power supply and one after … simples!
I mounted everything on a small ‘perf board’ I had knocking
about … they are only a couple of quid on e bay.
So here’s the component list , and we’ll get to the circuit
diagram and hooking it up in part 2.
1x LM7805 voltage regulator
1x 0.33uF ceramic capacitor
1x0.1uF ceramic
capacitor
And last but most important … an Allegro A1302 Hall effect sensor
E bay is good for all of these … a chunk of ‘perf board’ to hook it all up on would be cool … and if
you are feeling like being posh … a pair of banana sockets to attach the meter
and a box to put everything in (you could use an old pedal enclosure).
Sunday, 31 March 2013
Seems like about five minutes ago it was Christmas ... and now 'lookie lookie', we're into the Easter holidays ... scary how time charges along!
The main Oil City website has had a major overhaul, with input from some friends of mine (you know who you are) and is cracking along nicely. Our Oil City logos have had a professional re design, and I'm popping out new products left right and centre!
 Above is our classic P90 'FireWatch' pickup ... and hot on its heels will be a fully humbucking pickup in a P90 shell. featuring the power and breadth of my BrassKnuckle in a smaller, P90 guitar friendly package.
My Cow-T-Ron pickups will soon be available with 'LollarTron' style curved top nickel covers as an option, and my humbuckers are now available covered or with zebra/reversed zebra/black or all cream bobbins.

All my Strat pickups are now available with baseplates to special order ... and they are also available as an after-market part in my fetching 'gun blued' finish.
Still got to get Mini Humbuckers and Frebird pickups off the blocks ... and Jaguar and Jazzmaster units will be following them up.
My next set of blog posts should be some 'how to' posts ... including how to build a polarity tester/gauss meter ... and some fun wiring doodads.
The main Oil City website has had a major overhaul, with input from some friends of mine (you know who you are) and is cracking along nicely. Our Oil City logos have had a professional re design, and I'm popping out new products left right and centre!

My Cow-T-Ron pickups will soon be available with 'LollarTron' style curved top nickel covers as an option, and my humbuckers are now available covered or with zebra/reversed zebra/black or all cream bobbins.

All my Strat pickups are now available with baseplates to special order ... and they are also available as an after-market part in my fetching 'gun blued' finish.
Still got to get Mini Humbuckers and Frebird pickups off the blocks ... and Jaguar and Jazzmaster units will be following them up.
My next set of blog posts should be some 'how to' posts ... including how to build a polarity tester/gauss meter ... and some fun wiring doodads.
Tuesday, 5 February 2013
Phew!
I’ve been so busy recently I’ve hardly had a chance of
keeping the blog up to date. Custom jobs and new products … as well as keeping
all of you supplied with old favourites like Triple Blues Strat sets and
HardMan Tele pickups. Well, I will have been going full steam ahead for very
nearly a year now and I’m a little shocked by the way the business has come on.
There are literally hundreds of guitarists using Oil City pickups all over the
country … and abroad too! I have had to
build ‘Gloria’ my ‘mark three’ winding machine to cope with the demand … I will
post pictures as soon as I have time to
tidy her up. She had to be pressed into service even before she was properly
finished!
I’ve just got the new ‘CowTron’ pickup added to the list of
production pickups …
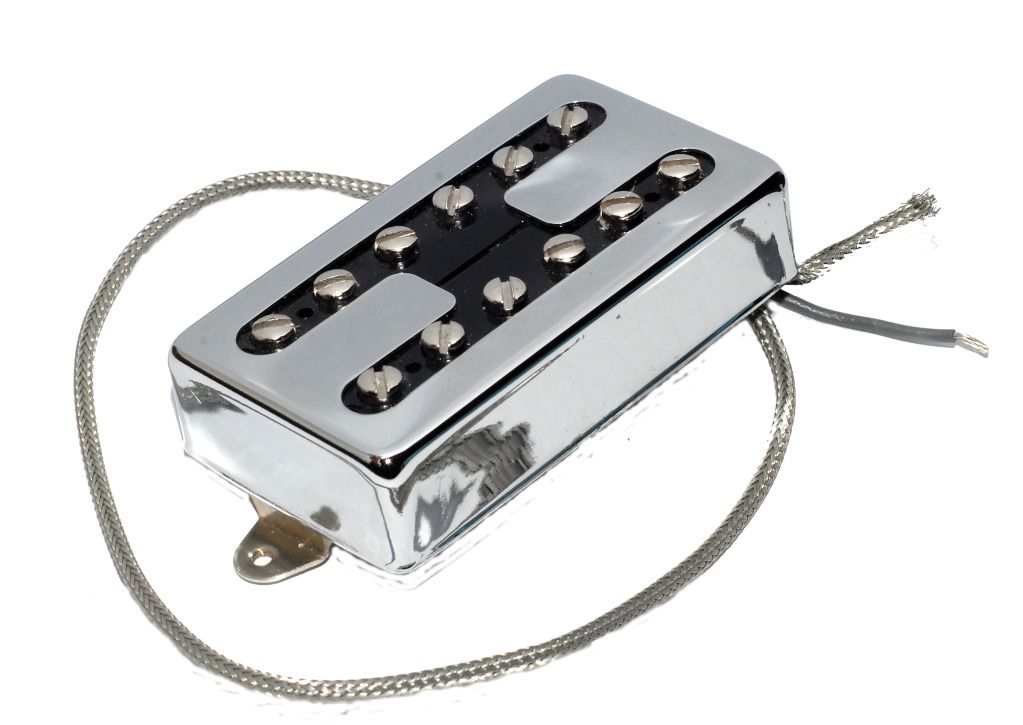
and a new high output Strat set known as StoneTones … and now there is
barely a day goes by without the familiar sight of me doing the ‘post run’ at the
local corner Post Office. A carrier bag packed with padded envelopes bearing
our familiar ‘industrial sunset’ logo. Yes it’s all very East End!
The only down side is that I have had no time to gig, see
live music … or indeed to see much of the outside world!
Subscribe to:
Posts (Atom)